Glute Bridge
The simplest, most underrated hip extension exercise: lie down, drive your hips up, and learn to fire your glutes on demand.
What is the glute bridge?
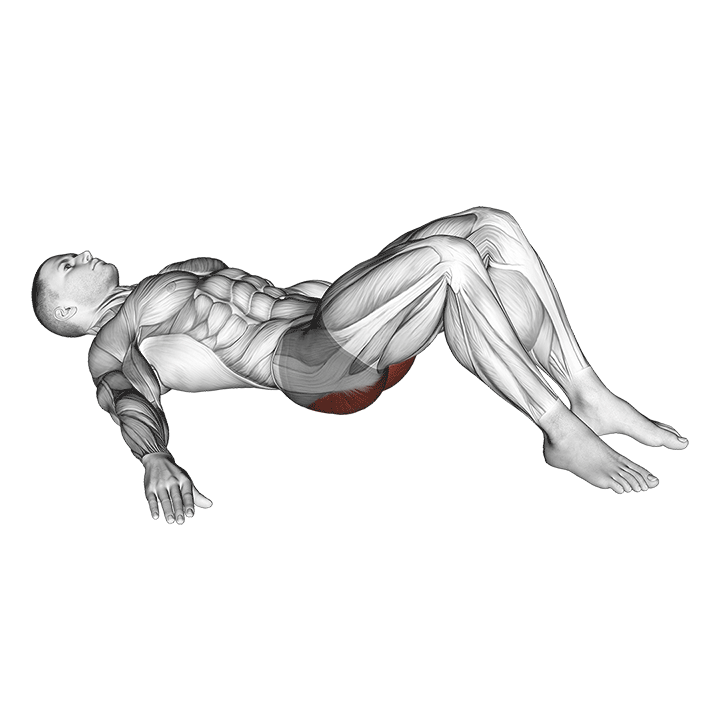
The glute bridge is a floor-based hip extension where you lie on your back, knees bent, feet flat, and drive your hips up by squeezing your glutes. It's the foundation movement that teaches you to extend the hip without arching the lower back, the same pattern that powers deadlifts, sprints and hip thrusts. It's used in physio rehab, warm-ups, and as a teaching tool for athletes who can't fire their glutes after years of sitting.
How to do the glute bridge
Common mistakes
- Overextending the lower back. If your ribs flare and you arch at the top, your back is doing the work, not your glutes. Tuck the pelvis and stop at neutral.
- Pushing through the toes. Toes-driven bridges shift the load to the quads and calves. Push the floor away through the heels.
- Feet too far from glutes. Feet far away turns the bridge into a hamstring exercise. Heels just under or slightly past your knees at the top.
- Knees caving in. Knees falling toward each other kills glute activation. Push them out actively to engage the glute medius.
Variations & progressions
Double-leg bridge with band
Loop a mini-band around the knees and push out as you bridge. Forces glute medius to fire, ideal for beginners.
Single-leg glute bridge
Lift one foot off the floor and bridge with the other. Doubles the load, exposes left-right asymmetries.
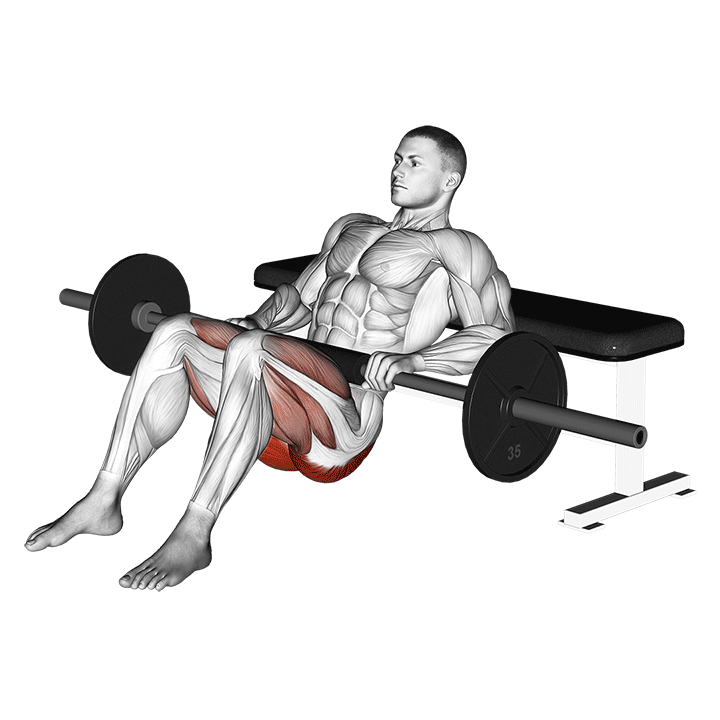
Hip thrust
Shoulders on a bench, barbell across the hips. Same pattern, much greater range and load. The graduation lift.
How to program it
Three protocols by goal. Pick one per cycle and aim for progression on load or distance.
| Goal | Sets × Distance | Load | Rest |
|---|---|---|---|
| Activation / warm-up | 2 × 15 | Bodyweight | 30 s |
| Hypertrophy | 3 × 20 | BW + 1-2 s hold | 45-60 s |
| Strength (loaded) | 4 × 8 | 20-40 kg on hips | 90 s |
Add the glute bridge to your ZON program
Track load, distance and progression in one timeline.